MENU
  • eFootball LABO: Player Ratings, Formations and Tools
  • Contact
  • Terms & Disclaimer
  • Privacy Policy
  • Editorial Policy
eFootball guides, player ratings and training tools
eFootball LABO
  • eFootball LABO: Player Ratings, Formations and Tools
  • Contact
  • Terms & Disclaimer
  • Privacy Policy
  • Editorial Policy
eFootball LABO
  • eFootball LABO: Player Ratings, Formations and Tools
  • Contact
  • Terms & Disclaimer
  • Privacy Policy
  • Editorial Policy
  1. Home
  2. Formations & Tactics
  3. eFootball 4-2-1-3 Formation: Tactics & Best Managers

eFootball 4-2-1-3 Formation: Tactics & Best Managers

2026 11/04
Formations & Tactics
04/11/2026
In short: 4-2-1-3
  • Rank B. Tested over five games in Division 3.
  • A back four and two DMFs make it very hard to score against, and three forwards counter from there.
  • It relies on winning the ball high up. If you cannot, chances dry up against a deep block.

The 4-2-1-3 is a defensive front three with two DMFs behind it. A back four and a double pivot make a solid base, and strong wingers counter fast from it. It suits you if your first aim is not to lose. The weight sits at the back, though, so the attack has less punch and most of the goals come from the counter.

Contents
  1. 4-2-1-3: overview
  2. What it does well, and where it hurts
  3. The shape
  4. How to attack
  5. Building up
  6. Mistakes people make, and the fix
  7. How to defend with it
  8. Players and playing styles that fit
  9. Best managers for this formation
  10. Matchups
  11. FAQ
  12. Summary

4-2-1-3: overview

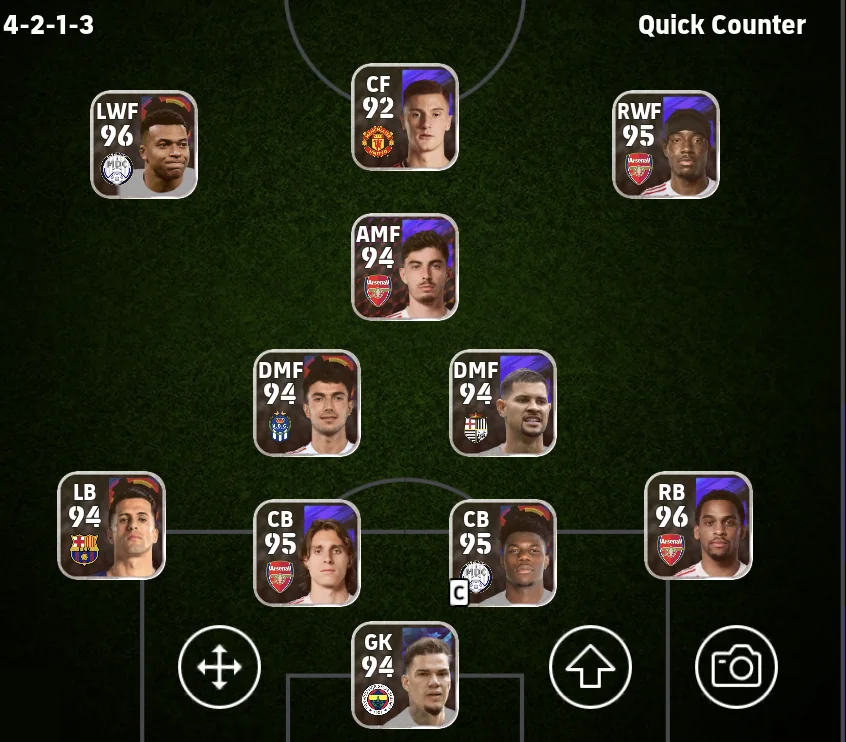
4-2-1-3 formation
RankBTested over five games in Division 3
In one lineA defensive front three with a double pivot, built not to lose
Biggest weaponA solid back four and two DMFs, and a counter with three forwards
Biggest weaknessGoals come from the counter: without winning it high up, you run out of ideas
Suits you ifYou want to defend solidly and attack fast with strong wingers
Not for you ifYou want to keep the ball and attack patiently
Team PlaystyleLong Ball Counter / Quick Counter

Rank B. Three wins, a draw and a defeat in five games in Division 3. The rank is provisional.

What it does well, and where it hurts

4-2-1-3 ProfileCentral1/5Wide4/5Possession2/5Counter4/5
✓Pros
  • Three forwards press from the front, so you can win it back high up.
  • Full-backs join in, which gives real depth to attacks down the flank.
  • A back four and two DMFs are very solid: two goals conceded in five games.
×Cons
  • The DMFs sit deep, so the flanks get little support and moving up the pitch is hard.
  • Two DMFs make the team heavy at the back, so it is hard to commit numbers to attacks.
  • One CF makes it hard to break through the middle.

The shape

4-2-1-3 formation

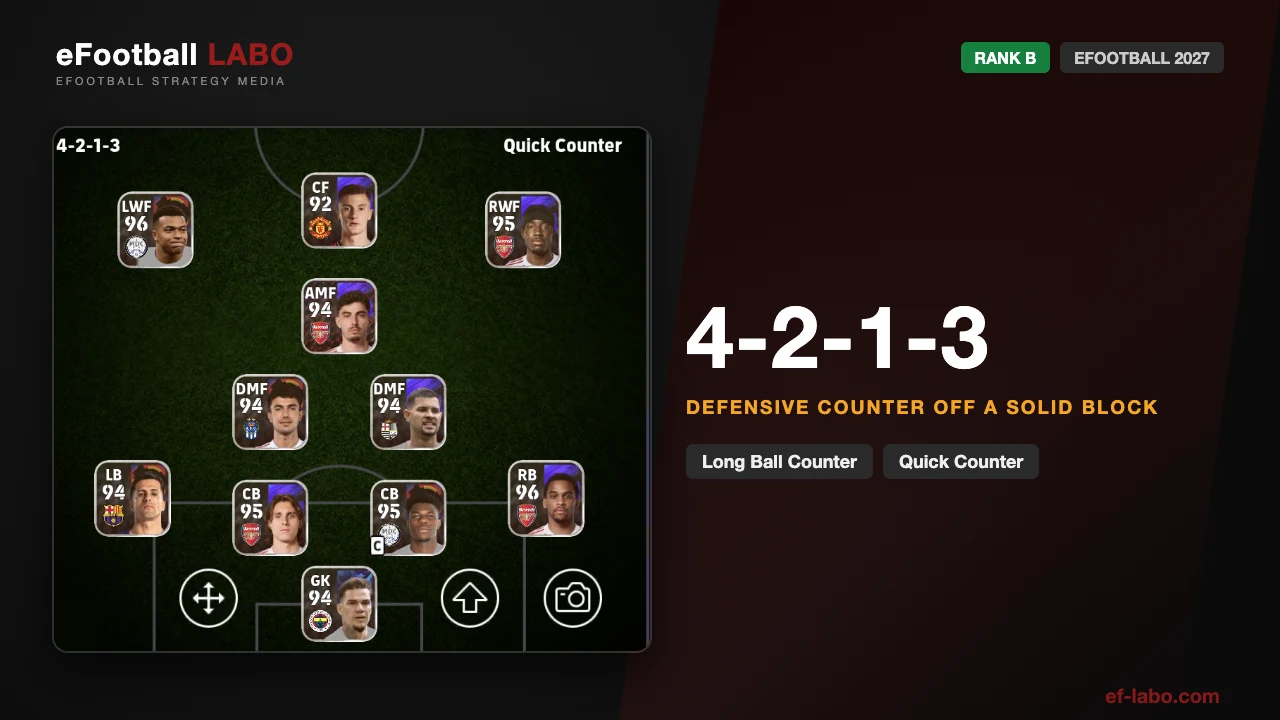
4-2-1-3: a back four, two DMFs, an AMF and three forwards.

Three forwards up front, with an AMF and two DMFs in midfield. The weight sits at the back, so the goals come from full-backs getting forward and wingers who can beat a player.

How to attack

The counter is the main route. Get it out to a winger straight after winning it, and if you lose it, win it back at once and go for goal again.

Press where you lost it, then go

Give it to a winger to attack alone. If it is lost high on the flank, that is your chance, not a problem.

4-2-1-3 Counter-pressing straight into a breakOpponentRWFAMFCF1. Trap them on the touchline and press2. Win it high up3. To the CF in the middle4. ShootPassShotRunScorer
  1. The CF, a winger, the AMF and the full-back trap them on the touchline and press
  2. You win it back high up, with their shape broken
  3. The ball goes to the CF in the middle
  4. The CF shoots

The full-back overlaps

Set the full-backs to Offensive in Individual Instructions to add numbers down the flank.

4-2-1-3 The full-back overlapsRBAMFRBCF1. Start the move through the AMF or winger2. The full-back overlaps3. Cross4. ShootPassShotRunScorer
  1. The move starts through the AMF or a winger
  2. The RB overlaps to create the overload
  3. The through ball finds the RB, who crosses
  4. The CF finishes the cross

Building up

The two DMFs are a safe way out, but they sit deep, so pushing the flanks up is what matters. When the middle gets crowded, go round through a full-back.

Through the DMFs

With two DMFs, one of them is always free to take it safely.

4-2-1-3 Build-up via the pivot (two DMFs makes it steady)GKCBDMFDMFAMF1. From the CB2. Both DMFs come to receive3. To the AMFPassShotRunScorer
  1. A CB plays it into midfield
  2. Both DMFs come to receive, so one is free
  3. When that DMF can turn, the ball goes into the AMF

Round the side when the middle is shut

When the middle is blocked, go from CB to full-back. Use the AMF dropping in to get back inside.

4-2-1-3 Build-up round the side (CB to full-back to AMF, then inside)GKCBLBAMFCF1. CB to the full-back2. To the AMF coming to receive3. To the CF or winger in the middlePassShotRunScorer
  1. A CB plays it out to the LB
  2. The LB finds the AMF coming to receive
  3. The AMF moves it on to the CF or a winger who has come inside

Mistakes people make, and the fix

You play a forward pass to the AMF with their back to goal, and get countered

Why it happensWhat to do
The AMF is tightly marked. Receiving with a marker behind them, the ball gets taken in the middle.Check the AMF is free before the pass. If not, go back to a DMF.

You rush forward passes and keep losing the ball

Why it happensWhat to do
Hurrying when it is not a counter means running into a set block.When they sit deep, pass calmly and switch to keeping the ball.

How to defend with it

Defending is the biggest weapon here. Two DMFs in position close the middle, and that is the base of everything.

AreaWhat to do
MidfieldKeep both DMFs in the middle wherever you can, and do not leave space there.
WideThe space a full-back leaves when pushing on is the hole. Play quick CBs who can cover it.
When aheadSet both full-backs to Defensive in Individual Instructions to close it down further.

Players and playing styles that fit

Your wingers and your forward have to make the difference on the counter. These are the styles the shape asks for.

PositionPlaying StyleWhy
CFGoal PoacherThe runner on the counter. Pace and finishing to finish it in one go.
LWF / RWFProlific WingerStay wide and start the counter. They need the quality to attack alone.
AMFCreative PlaymakerThe centre of the attack: moves to receive, then runs into the space that opens.
DMF (one)OrchestratorThe way out for passes from the CBs and full-backs. Draws the ball and moves it forward.
DMF (the other)Anchor ManMoves up and down little, keeps the defence stable and holds the middle.
Full-backsFull-back Finisher / Offensive WingbackAttacking full-backs bring the flank to life. Keep a defensively strong full-back with no playing style in the squad against counters down the flank.
CBsQuick and good on the ball, or Build UpLong balls to the wingers after winning it, and the pace to cover behind the full-backs.
Find the players
eFootball Best Players Tier List & Ranking by Position

Best managers for this formation

4-2-1-3 runs on Long Ball Counter and Quick Counter, so what you want is a manager with high Team Playstyle Proficiency for those. Every manager below is rank SS on eFootball LABO — high proficiency, a Booster and Link-up Play — picked for their proficiency in these Team Playstyles.

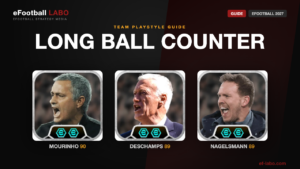
Best managers for Long Ball Counter

José Mourinho
José MourinhoFinishing +1 / Aggression +1
90
Ronald Koeman
Ronald KoemanKicking Power +1 / Jumping +1
89
J. Nagelsmann
J. NagelsmannDribbling +1 / Physical Contact +1
89
D. Deschamps
D. DeschampsSpeed +1 / Ball Control +1
89
F. Beckenbauer
F. BeckenbauerDribbling +1 / Defensive Awareness +1
89

Best managers for Quick Counter
Jürgen Klopp
Jürgen KloppDefensive Awareness +1 / Stamina +1
90
Antonio Conte
Antonio ConteDefensive Awareness +1 / Kicking Power +1
90
R. Martínez
R. MartínezFinishing +1 / Attacking Awareness +1
90
V. Montella
V. MontellaAcceleration +1 / Tight Possession +1
89
Thomas Tuchel
Thomas TuchelLow Pass +1 / Stamina +1
89
The rule that matters

Win it high up and get it to a winger. Check the AMF is free before the pass, and keep both DMFs in the middle.

Matchups

OpponentMatchupWhy, and what to do
Teams looking to play Long Ball CounterPoorThey leave you the ball, your pace is wasted and the game gets stuck. Do not rush; be patient and pick your moment to win it.
Teams using attacking full-backsGoodThree forwards can counter into the space behind those full-backs. Absorb it, then break fast.

Matchups are provisional. We update them as we play more.

FAQ

Is 4-2-1-3 good in eFootball?
It is rank B on eFootball LABO: very solid at the back, but it relies on the counter for goals.
What Team Playstyle should I use with 4-2-1-3?
Long Ball Counter or Quick Counter.
What is the weakness of 4-2-1-3?
Goals come from the counter. If you cannot win the ball high up, it struggles to break down a deep block.
What should I do when I am ahead?
Set both full-backs to Defensive in Individual Instructions.

Summary

✓4-2-1-3: the short version
  • The spine of it is a defensive front three with two DMFs. Not losing is what it does best.
  • Goals come from winning it high up and countering, and from full-backs getting forward.
  • The space behind the full-backs is the hole, so use quick CBs.
More from eFootball LABO
eFootball Best Formation – Tier ListeFootball Manager Tier List & Playstyle ListeFootball Manager Database: Proficiency, Boosters & Ranks
Last updated: 03 November 2026. Ranks and matchups are eFootball LABO’s own.
Try these tools next
Player Progression CalculatorPlayer Progression CalculatorSpend the points and see every stat updateCompare PlayersCompare PlayersAny two cards side by side, all 26 statsPack Opening SimulatorPack Opening SimulatorYour real chance and the coins it costsBest Players by PositionBest Players by PositionThe strongest card at every position
Compare PlayersCompare PlayersAny two cards side by side, all 26 statsPlayer Progression CalculatorPlayer Progression CalculatorSpend the points and see every stat updatePack Opening SimulatorPack Opening SimulatorYour real chance and the coins it costsBest Players by PositionBest Players by PositionThe strongest card at every position
Compare PlayersCompare PlayersAny two cards side by side, all 26 statsPlayer Progression CalculatorPlayer Progression CalculatorSpend the points and see every stat updatePlayer Skills + Skill SearchPlayer Skills + Skill SearchSearch every card by skillBest Players by PositionBest Players by PositionThe strongest card at every position
Player Skills + Skill SearchPlayer Skills + Skill SearchSearch every card by skillCompare PlayersCompare PlayersAny two cards side by side, all 26 statsPlayer Progression CalculatorPlayer Progression CalculatorSpend the points and see every stat updateBest Players by PositionBest Players by PositionThe strongest card at every position
Manager DatabaseManager DatabaseProficiency, boosters and Link-up PlaysPlayer Progression CalculatorPlayer Progression CalculatorSpend the points and see every stat updateCompare PlayersCompare PlayersAny two cards side by side, all 26 statsBest Players by PositionBest Players by PositionThe strongest card at every position
Player Progression CalculatorPlayer Progression CalculatorSpend the points and see every stat updateCompare PlayersCompare PlayersAny two cards side by side, all 26 statsBest Players by PositionBest Players by PositionThe strongest card at every positionPack Opening SimulatorPack Opening SimulatorYour real chance and the coins it costs
Pack Opening SimulatorPack Opening SimulatorYour real chance and the coins it costsPlayer Progression CalculatorPlayer Progression CalculatorSpend the points and see every stat updateCompare PlayersCompare PlayersAny two cards side by side, all 26 statsBest Players by PositionBest Players by PositionThe strongest card at every position
Formations & Tactics
Let's share this post !
  • Copied the URL !
  • Copied the URL !

Author of this article

Mikelのアバター Mikel

Mikel is the editor of eFootball LABO. A long-time eFootball player (peak Division 1, peak rating 1,920), he writes from real play and hands-on testing.

Related Post

  • eFootball 5-3-2 Formation: Tactics & Best Managers
  • eFootball 4-1-4-1 Formation: Tactics & Best Managers
  • eFootball 4-3-2-1 Formation: Tactics & Best Managers
  • eFootball 4-4-2 Formation: Tactics & Best Managers
  • eFootball Overload: How It Works, Best Formation & Managers
  • eFootball Long Ball: How It Works, Best Formations & Managers
  • eFootball Out Wide: How It Works, Best Formations & Managers
  • eFootball Long Ball Counter: How It Works, Best Formations & Managers
Category
  • Best Players (297)
    • By Position (38)
    • By Stat (27)
    • Playing Styles (23)
  • Coins & Events (5)
  • Formations & Tactics (23)
  • Guides & Basics (3)
  • Managers (74)
  • Other Languages (27)
    • Bahasa Indonesia (3)
    • Español (Latinoamérica) (3)
    • Français (9)
    • Português (Brasil) (3)
    • Türkçe (3)
    • العربية (3)
    • ไทย (3)
  • Player Skills (66)
  • Players (2,730)
  • Special Player & Packs (112)
  • Training (1)
Search
Category
  • Best Players (297)
    • By Position (38)
    • By Stat (27)
    • Playing Styles (23)
  • Coins & Events (5)
  • Formations & Tactics (23)
  • Guides & Basics (3)
  • Managers (74)
  • Other Languages (27)
    • Bahasa Indonesia (3)
    • Español (Latinoamérica) (3)
    • Français (9)
    • Português (Brasil) (3)
    • Türkçe (3)
    • العربية (3)
    • ไทย (3)
  • Player Skills (66)
  • Players (2,730)
  • Special Player & Packs (112)
  • Training (1)

Copyright

© 2026 Konami Digital Entertainment
All copyright and other intellectual property rights in the game images and data used on this site belong to the publisher of the game.
The content on this site is created independently by the eFootball LABO editorial team.
Unauthorised use or reproduction of the data and images published on this site is strictly prohibited.

© eFootball LABO.

TOC